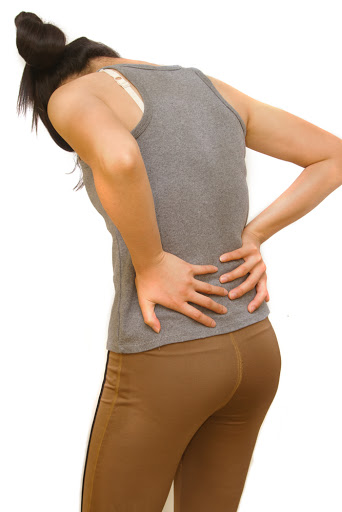
Believe it or not, most people develop lower back pain from their fitness routines.
I know most people believe working out will make them healthier and stronger, and if done correctly, a well-rounded fitness routine will create a healthy body.
However, if you don’t have the proper awareness to balance your muscles during your exercise regime then you may be developing the right muscles to get the wrong results.
A vast majority of lower back pain is from tight hamstrings, tight back muscles or both. The key is to develop balance between these muscles.
We could spend months analyzing the endless possibilities of how your leg and back muscles can become imbalanced, so the main thing to know is that everything is connected.
Developing awareness of how your back and hamstring muscles work together, which is known as the posterior chain of muscles in your body, is important to understanding how to utilize the life changing moves below.
Move #1
The first movement is to get down into a runner’s lunge. Start with your right foot forward and left foot back. Keeping your arms straight with palms on the ground, let your back knee (left knee) lower to the ground, and bring your front foot (right foot) to the outside of the right hand.
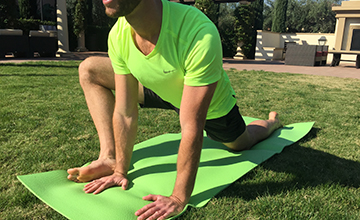
Repeat this motion and notice where it is you feel tight as you let your knee fall away from your side and your foot raises to it’s pinky toe side.
You can either do repetitions of this movement or stretch and hold as long as you like. I reccomend 10 reps on both sides, or holding a 1 minute stretch on both sides. And once you develop proper awareness it’s great to do more reps or longer holding period.
Make sure to switch legs and do this movement on the left side as well. And once you are comfortable with letting your knee fall away from the body you can gently move your hips forward as the leg falls away, and then backwards as the leg returns to the torso for a deeper stretch.
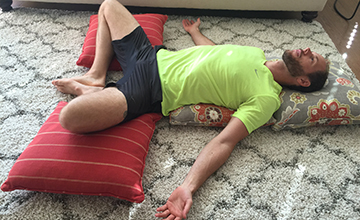
Move #2
The second movement is a gentle stretch that targets the inner hamstring muscle known as the semimembranosus muscle. We have 3 muscles that make up the hamstring and typically this is the one that gets the least attention due to our societal habits of over sitting and improper standing postures.
This movement is fun because we get to relax while we do it. I like to do this movement on my living room floor or my bed, but it can be performed at the gym or work.
Start by lying on your back. Place a pillow behind your shoulder blades and mid back. You can place one under your head too, but not necessary.
Let your arms fall to your sides, palms facing up towards the ceiling. Bring the bottom of your feet together which will let your knees fall out to the side in a butterfly stretch position.
It’s important to not strain the joints of your hips by letting the legs hang in mid air. Eventually you will have the control to let them hang, but for now it’s important to place either pillows, foam rollers, yoga blocks, etc underneath the outer side of your thighs.
Depending upon the height of the object you choose to support your legs, you may want to place it closer to the hips or closer to the knee. Regardless, the goal is to have your legs propped up in butterfly position at the height where you feel a gentle stretch. No straining.
When you finish your time in the movement use your hands to bring your knees up to touching each other. This will keep your joints and ligaments safe from any strain after being in this position for several minutes.
Move #3
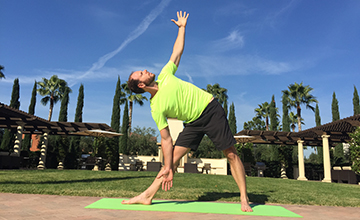
The final movement that will change your life forever is the triangle pose.
Begin by standing with both feet 4 - 6 inches inches wider than your hips, with your feet facing forward. Keeping your legs straight (with a micro bend in the knees) and pivot your right foot away from the body so it is positioned perpendicular with the middle of your left foot.
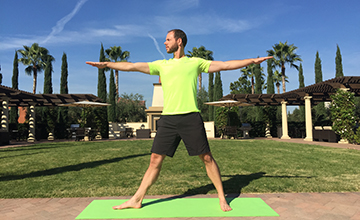
Once you have reached as far as it is comfortable, begin reaching your right hand down to your shin or ankle depending upon how flexible you are. You must keep your arms in alignment here so make sure the left goes up as far as the right goes down. Don’t let your torso bend or arch too much when reaching down. Once it begins to bend that is where you need to stay for now. Over time your movement will progress.
You can hold this pose or you can perform repetitions. To perform repetitions come out of the pose gently the same way you entered it and then re-enter slowly several times. I recommend 3-5 repetitions or holding this position for 30 secs at a time. Also make sure you continue to breathe during this movement.
Once you understand this movement to the right side you can now balance everything out by executing this same movement pattern to the left.
Application of Movements
Mastering these movements will offer you more than just freedom from lower back pain. These movements are specifically designed to strengthen the mind-body connection and increase mobility in your entire body.
By practicing these movements daily you will begin to find new ranges of motion in your body and strengthen all areas of your fitness lifestyle.
It’s important to remember these movements will benefit anyone of any age. You are never too old or too out of alignment to apply these simple techniques to realigning your body and developing proper functionality.
Josh was born and raised in Lexington, KY. He played collegiate soccer at Transylvania University where he also studied business and psychology. Upon graduating college in 2002 he chose to begin a professional career as a restaurateur. Josh watched his business grow exponentially over the course of a decade, while he watched his health steadily declined. In 2011 Josh developed a mysterious disease, that modern medicine could not explain. He decided to embark on an optimal health journey to discover a cure. His journey lead him to receive his certifications as a personal trainer, RKC Kettlebell instructor and Yoga Alliance instructor. Josh’s unique combination of business, personal training and ayurvedic nutrition experience organically spawned a system that is guaranteed to upgrade the life of everyone from office executive to professional athlete. Josh now pursues his passion in teaching others to find their perfect work, life balance.
Main Photo Credit: Fotos593/shutterstock.com